Sunday 30 November 2014

How to Dye Craft fur for my Monster puppet


How to Dye Craft fur

It appears that it is not an easy job to dye Long pile Craft Fur.


The fabric’s dyes don’t work properly as the craft fur actually is a Plastic fibre not a fabric
I needed faded olive green fur to make an old grumpy monster Puppet –Custom order and the suppliers of craft fur offer very limited
choice of colours especially of the Long pile fur.

So the only option was to customise somehow one of the existing green colours.
Firstly I started to experiment with bleach but even though I tried different kind of bleach (thick and thin) and different length of the treatment it did not work the bright green colour did not fade .


Then I continued to experiment with some multi-purpose spray paints but again was unsuccessful

In pure desperation as my customer had paid a deposit and the design was approved but I did not have material to work with (( ,I looked for other ideas and found a tutorial of how to dye a craft fur with acrylic paint.

I followed this tutorial and YES it worked
tested the colours on little pieces and the customer liked the colour No 2


I have bought good quality art acrylic paints as advised and some basic ones, but then the perfect tint was from the basic range and i worked with basic acrylic paint on the end


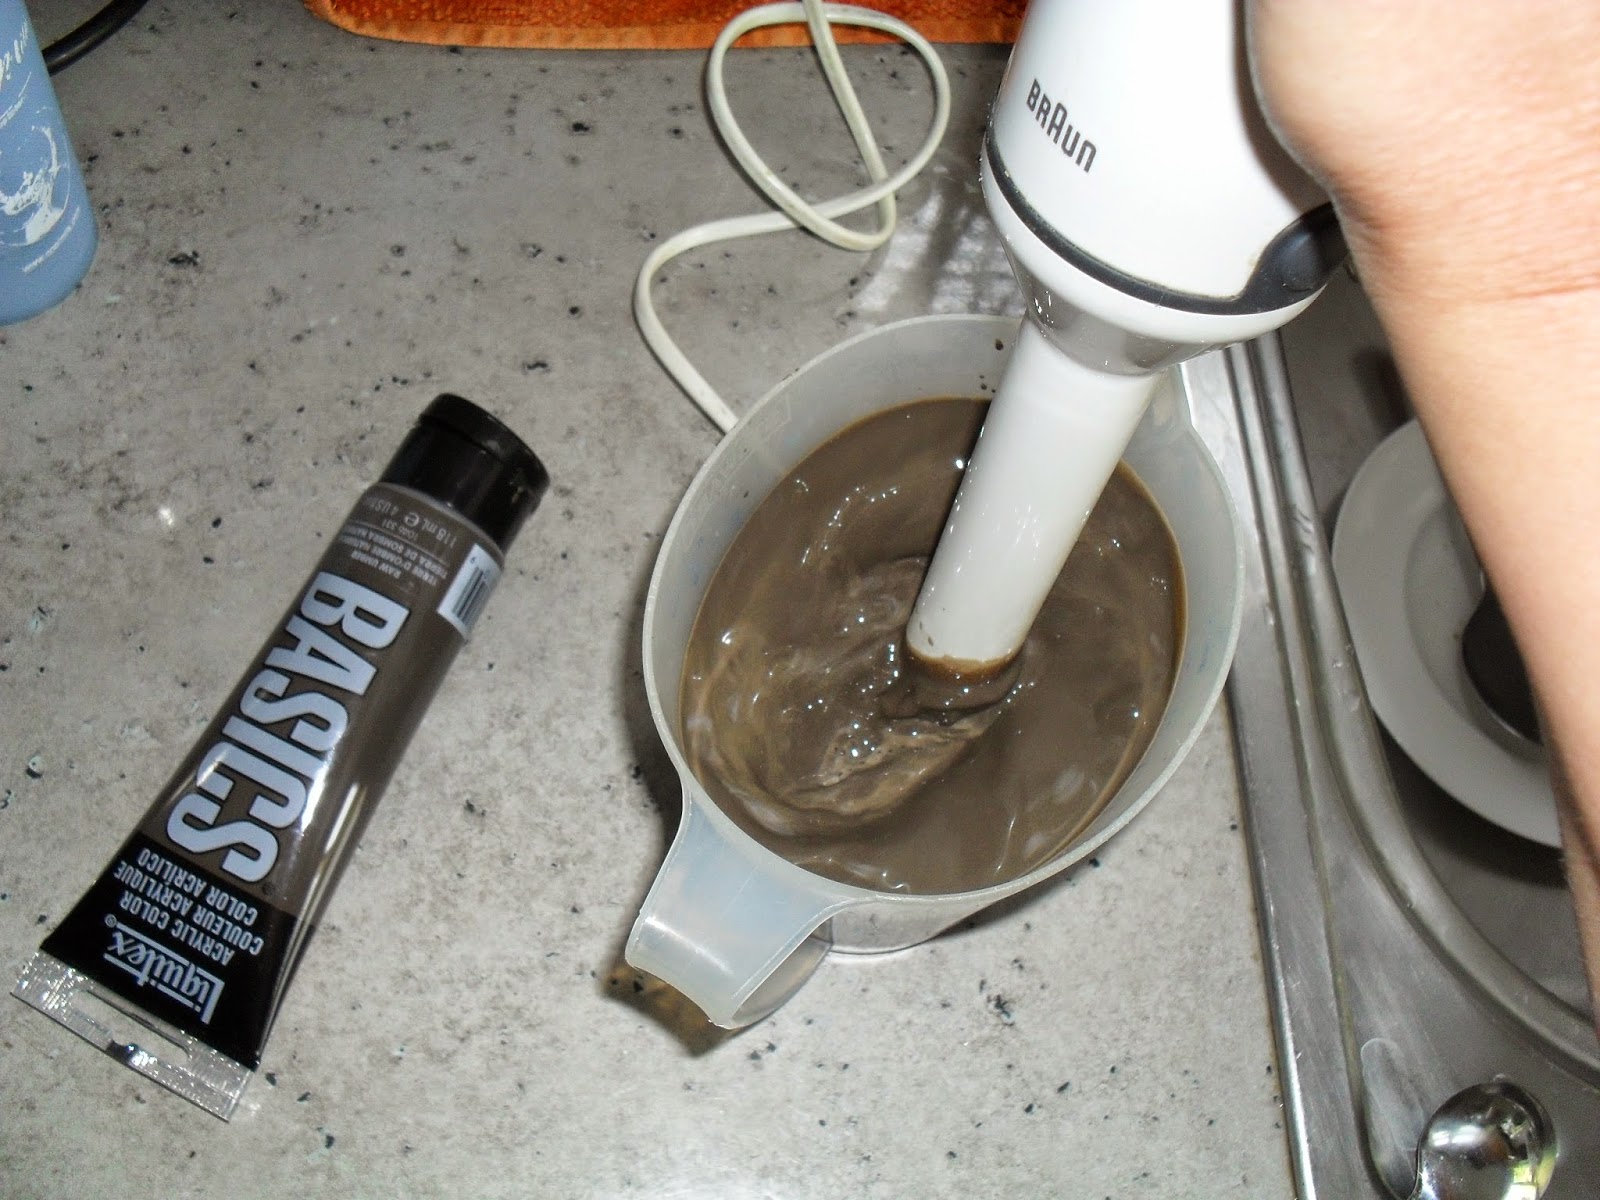
Then I have mixed the paint with water (improvised on the quantities of the water and the paint) I have used a blender (this was my contribution to the process )to get rid of the little lumps

Then applied the liquid to the fur with brush


I have Left the fur to dry as the idea is as the water evaporates ,it leaves the fabric dyed , well it took 4-5 days to dry most of the time outside and I took it in the night

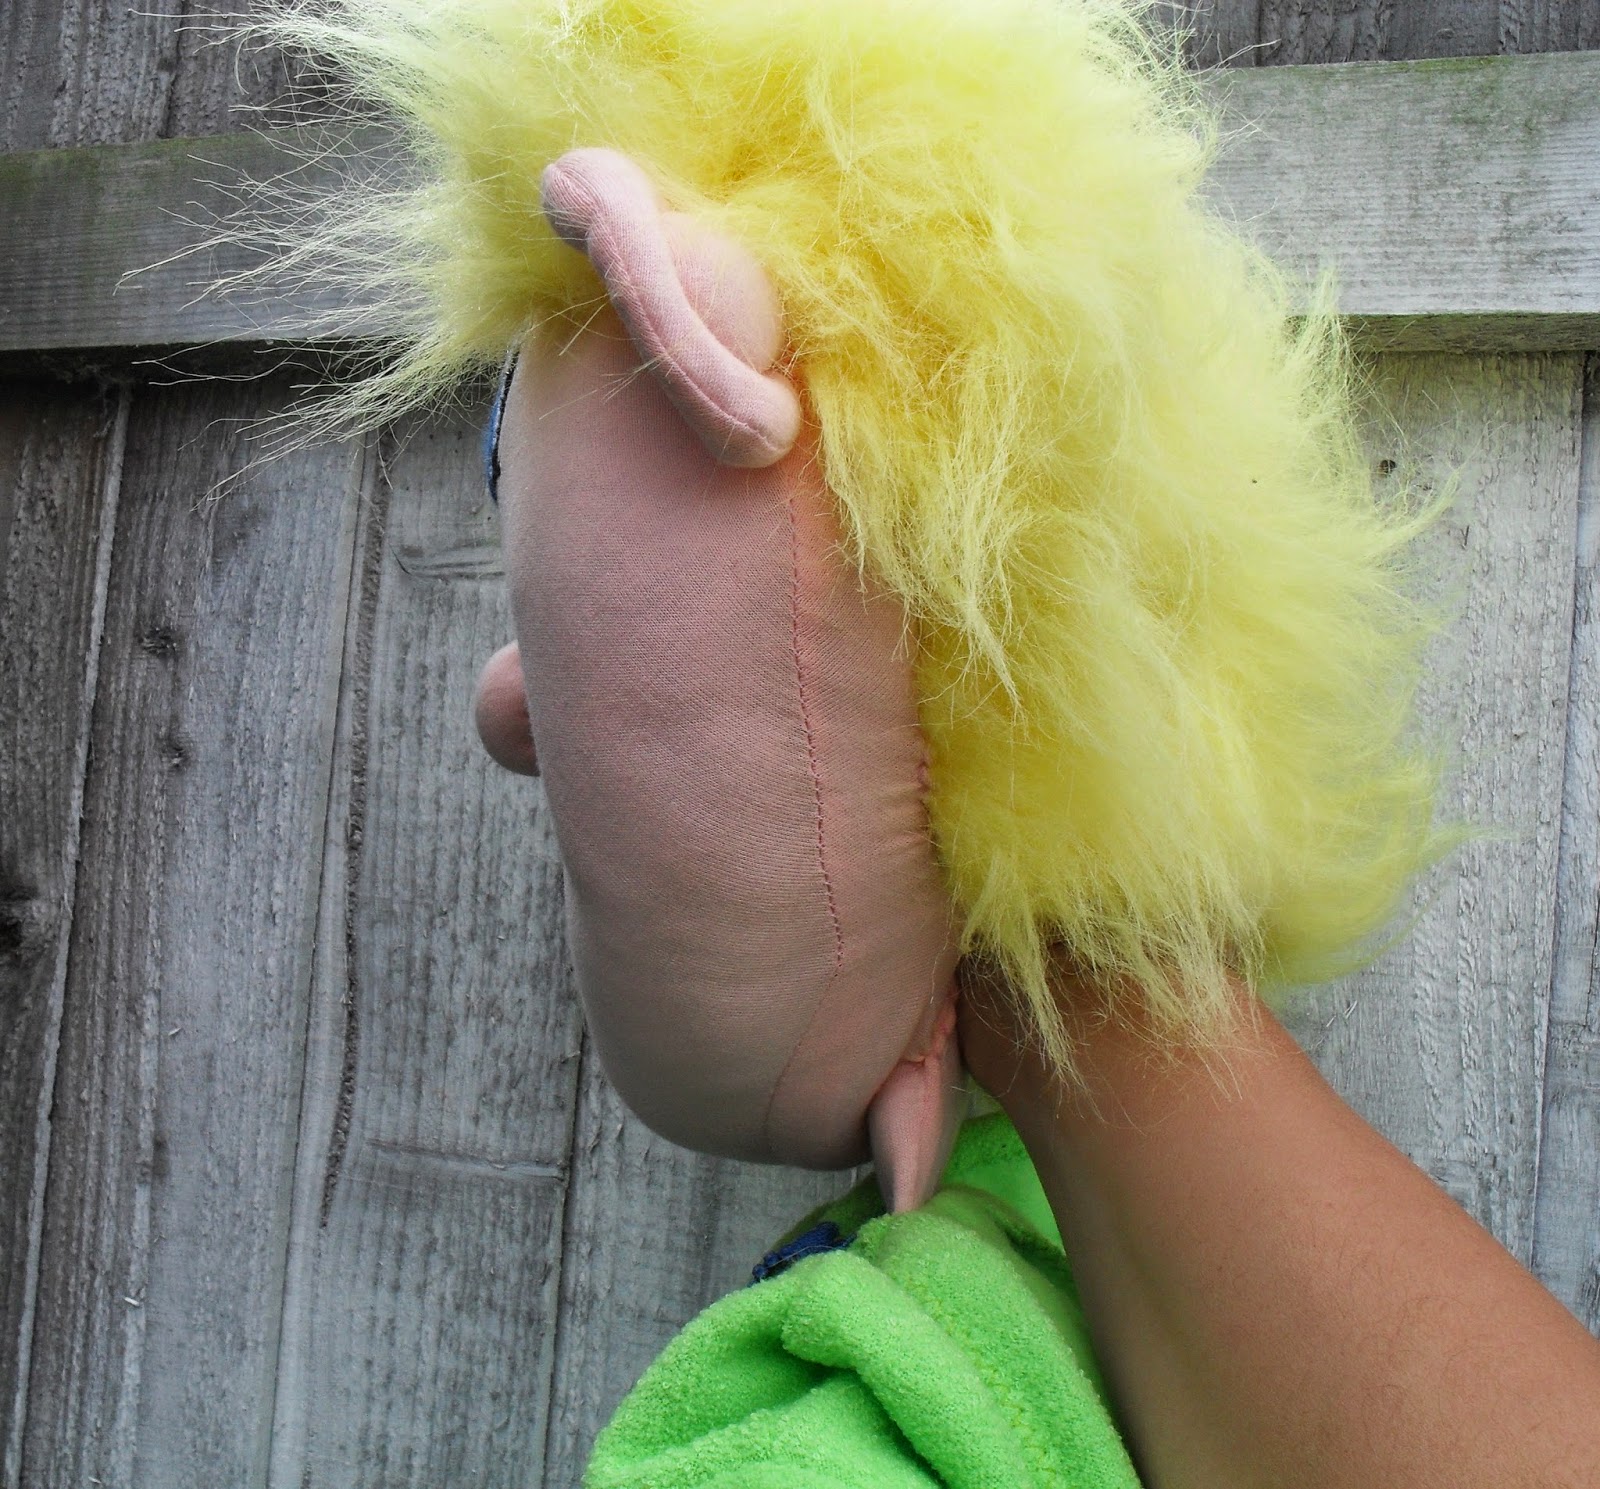
Then I brushed the dyed fur until it returns it’s fluffy appearance,
this exercise took a bit of a time and finally I got it - the perfect material for my Old Grumpy Monster puppet


The fur lost some of its quality and looked a bit worn but actually I was happy with the result, as the character supposed to be an old and worn and grumpy and this material was just what I needed

there was a down point , the material kept the odour of the acrylic paint


My Old and Grumpy monster

www.puppetsinabag.co.uk

Saturday 29 November 2014

On the third Day of Christmas -3 French hens -ornament

On the third day of Christmas
my true love sent to me:
3 French Hens

2 Turtle Doves
and a Partridge in a Pear Tree


3 in 1 - these are my 3 French hens in 1 ornament

I am continuing my 12 days of Christmas chalange


For this ornament my colours are more christmassy


I love designing hens .
For this ornament I wander how to represent the 3 hens ,firstly planned to make 3 identical elements but then decided to go for 3 in 1


and they become 3 sleeping hens


Thursday 27 November 2014

On the second day of Christmas - 2 turtle doves ornamet

On the second day of Christmas
My true love sent to me
2 Turtle Doves and ......


I realy enjoed making these little ornaments - two doves to continue with my " The 12 days of Christmas" Challenge


The felt is in pastel colours


Just a touch of colour was added at the blanket shitch


Some beads on the edge of the wings


To create an ornament inspired by these lines for the second day of Christmas was not very challenging ,probably i will be fine with the 3 hens as well but what about the higher numbers 4 calling birds and so ...

On the first day of Christmas - A Partridge in a Pear tree

The Twelve Days of Christmas ...
I like this Christmas Carol and I wanted to challenge myself to make 12 Felt ornaments inspired by this lovely song , and make a garland or something like bunting for the fireplace from the 12 little ornaments

The first one:


On the first day of Christmas
my true love sent to me:
A Partridge in a Pear Tree

I have selected pastel colours for this little ornament ,
in my fabric's drawer found this lovely cotton fabric with the pears that I kept for something special


Hope to make the second ornament soon ...

Saturday 15 November 2014

Free Sewing pattern - Christmas star topper

I would love to share the joy of making with you ... 

... and Felt is the perfect material  for Christmas decorations


How to make : Star –Christmas tree topper decoration – Scandinavian style ,with a little hanger on the top this little cute star can be lovely hanging ornament as well ,
this star pattern can be made into mobiles or other decor,get creative and select other colours i had used red and cream as I wanted to make Nordic /Scandinavian style ornament


Free Christmas Sewing pattern


Pictures and step-by step instructions

Christmas is the best time to get creative. Making our own Christmas ornaments makes the festive season even more special
Hand stitching and basic sewing skills are required


Allow approximately 1 hours to make it

Please note the ornament is not a toy, it is for decoration use only !!!!!!!!!!

What you need ...
White or Cream felt ( Felt Sheet –A4 -1mm thick)
Red felt ( Felt Sheet –A4 -1mm thick)
Black, felt
1 Felt ball in red
Toy stuffing
Thread: Cotton perle embroidery and machine tread
In RED ,White , Black
Optional :Decorative Felt Cord if you like to make it into hanging ornament
Fabric scissors
Needles
Tailors Chalk liner
Pins

Print out the templates for FREE from my Craftsy pattern shop :http://www.craftsy.com/pattern/sewing/home-decor/star-christmas-tree-topper-scandinavian/121027 it is a PDF file in full size no need of enlargement

And follow the instructions

Here are the stitches used for the project:
Blanket stitch
Running stitch
Back stitch

How to make Star size 12 cm (4.5) across :

1. Using the template, Cut out all of the shapes for the Star:

• 2 star shapes (1 in red and 1 in white)
• 1 half star shape in red
• 2 red circles for the cheeks
• 2 circles for eyes in black


2. Take the white star shape and attach the features

- Lay in place the cheeks and nose, then sew on
- Make the smile using running stitch

- Mark the places for eyes and using black thread embroider on the marks and add tiny eyelashes

3 Pin together the front white star shape , the red star shape and the half star
* optional if you like to make the star into hanging ornament insert a loop of felt cord on the top between th e two two shapes
4 Overstitch around using red threads and blanket stitch . Leave an opening for stuffing at one of the sides

5.   Fill the Star’s body lightly with toy stuffing and stitch the opening close

Your Scandinavian style Star topper of felt ornament is ready !!! Enjoy making with felt lots more sewing patterns are available for Instant download at my Craftsy pattern shop http://www.craftsy.com/pattern/sewing/home-decor/christmas-ornaments-santa-robin-penguin-/111692 and Etsy https://www.etsy.com/uk/shop/Puppetsinabag

Thank you and keep making :)))


and the hanging ornament option

Please have a look at my other patterns I can offer lots of lovely Christmas ideas , Fun Patterns for marionettes and puppets visit my website www.puppetsinabag.co.uk


Thank you


Friday 7 November 2014

Pro puppet - for a parent and toddler group Adventure Ben

Adventure Ben Pro puppet - was a challenge!!!!


The customer needed a puppet for their new business - parent and toddler group.
They had an image of Adventure Ben and the brief was very clear - we would like a puppet that is a very close resemblance.
Well it is a difficult task to work from someone else's designs .Then to be even more complicated they already had one Ben made by other puppet maker that they did not liked... so no pressure at all !!!!!


For the puppet style : I suggested non mouth operated puppet and I was very happy that the customer agreed.
So the puppet actually could be controled as a hand puppet

So to make shoes and hoodie as on the picture of the character was my second task in terms of creating such a resemblance

I was so happy that the customer liked the finished puppet Ben , they just had some opinion on his wild hair but this was easily resolved with some styling
like on the picture bellow .
I thought that a wild hair style will support the main concept of an adventures boy but with his hair combed he looks cute
Custom made puppets  Available in my website 

Thursday 6 November 2014

Personalised cushion - gift for a little boy

I love making personalised items and loved this commision as it was from a returning customer.

the Brief -Cushion / Pillow with a name on for one year old boy

I looked at all my blue cottons and selected lost of patterns of dots and stars

then I made a templates for the letters of the name

I had fun playing around to find the best combination of blues

and I have arranged the letters to be higgledy - piggledy


With orders like this i dream to have one of those fab embroidery machines but then they are pretty expensive.
Maybe if I had one, as a non technical person I probably will straggle to operate with it, so my basic "Singer" is just perfect for me


And here it is a lovely Personalised Cushion ,
hope my customer to like it as they left all design decisions to me and i really enjoyed the making


Available in my ETSY shop